Import walkthrough
Import questions from Excel, CSV or Word — step by step
Five steps, with screenshots from the real editor, plus a checklist you can tick off as you prepare your file. Nothing is saved until you confirm the preview.
Not sure about the format? Download a sample
Step 1
Download a template
Start from a template so the column names and answer key already match what the importer expects. Excel and CSV use one row per question; Word uses numbered questions with an “Answer: B” line.
- Keep the header row exactly as it comes — you can still rename columns later while mapping.
- One question per row, one option per column (Option A, Option B, …).
- Correct Answer accepts a letter (B), a number (2) or the full option text.
Step 2
Drag & drop the filled file
Open your test, scroll to “Import questions” and drop the file on the dashed area — or click browse files. Accepted: .xlsx, .xls, .csv, .docx, .txt up to 10 MB.
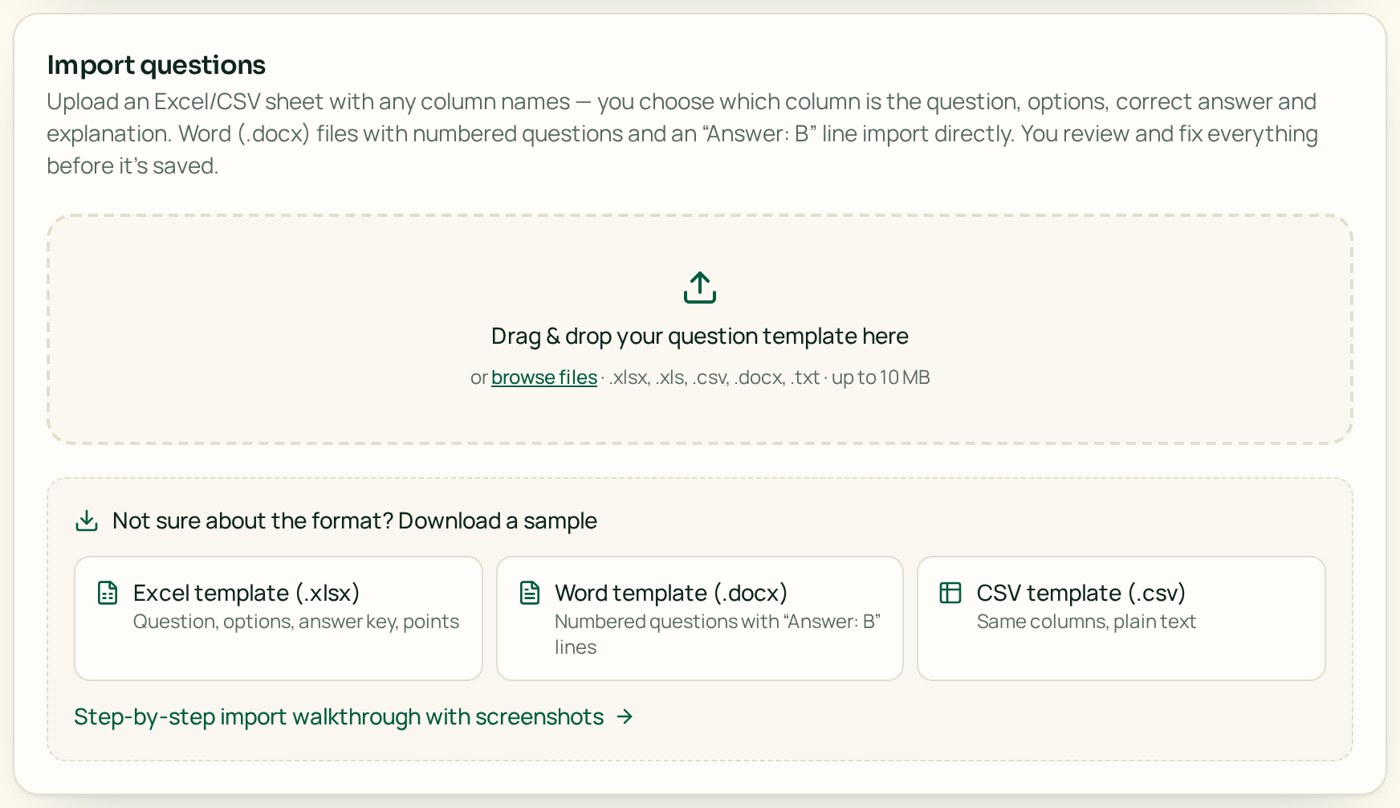
The Quizforge import panel showing the drag and drop area and the Excel, Word and CSV template downloads - A green bar confirms the file was read and shows how many rows loaded.
- If the file is rejected, check the extension and that it is under 10 MB.
Step 3
Map the columns
Tell Quizforge which column holds the question, the correct answer, the explanation and the points, then tick every column that holds an answer choice. A live preview of the first three questions updates as you change the mapping.
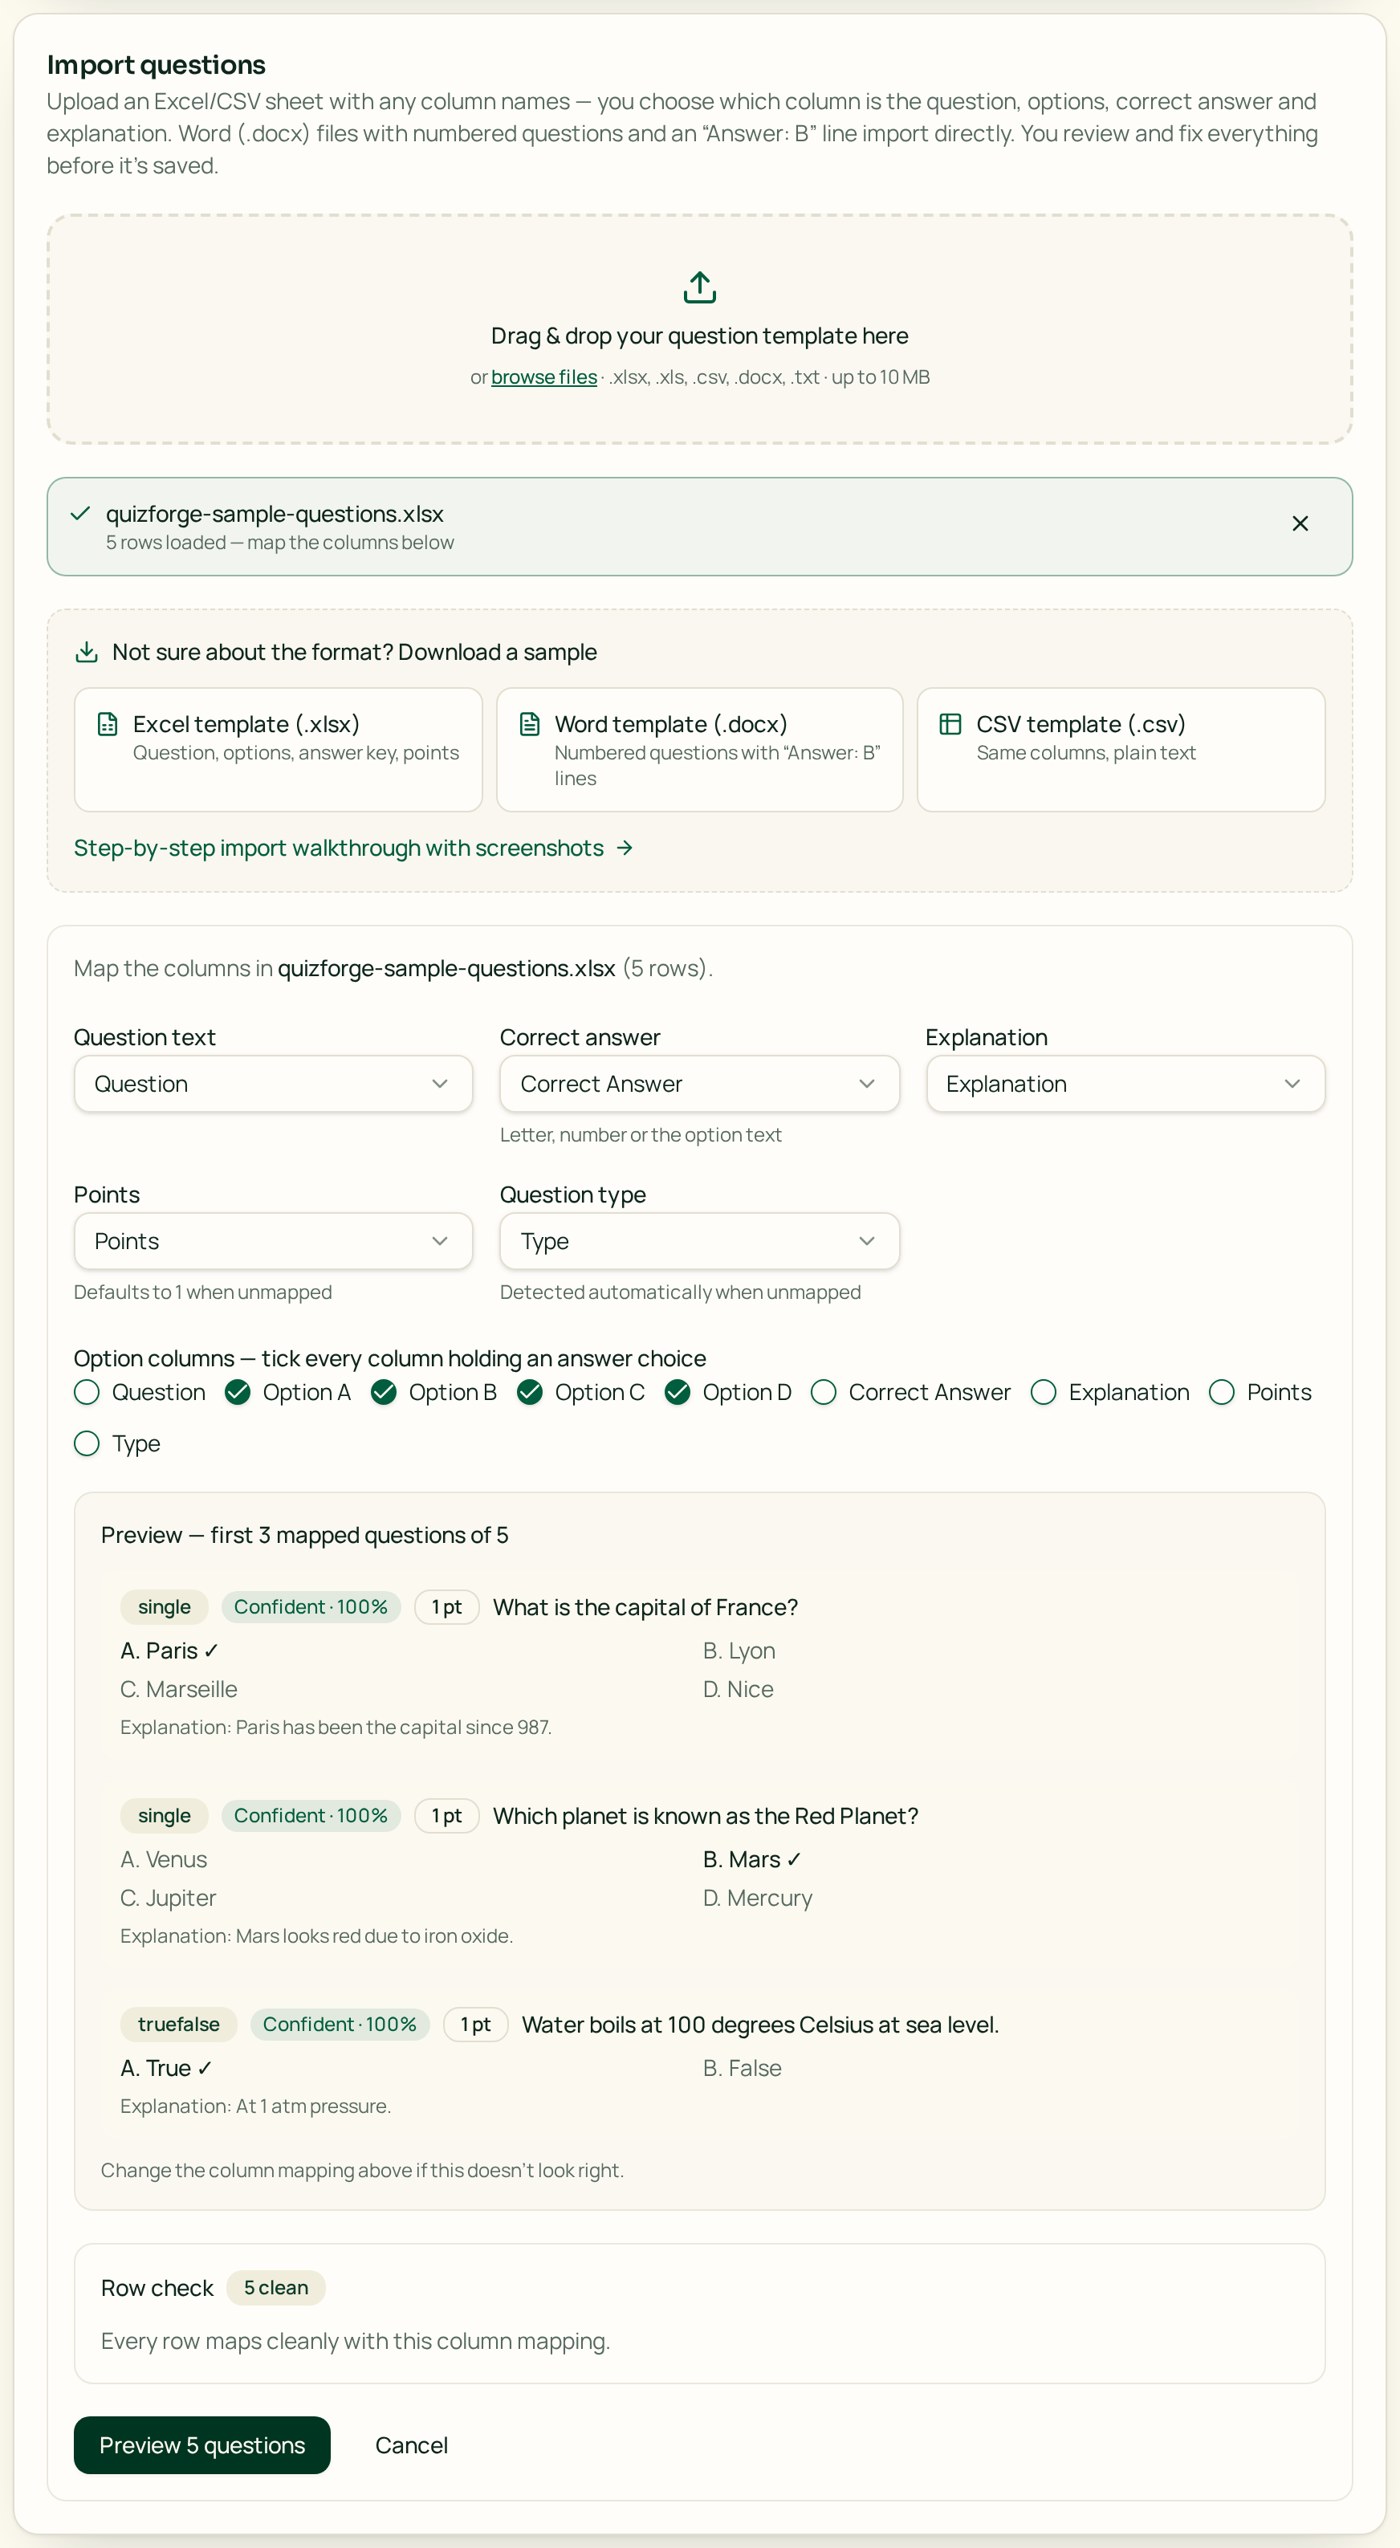
Column mapping screen with dropdowns for question text, correct answer, explanation and points, plus option column checkboxes - Question type is detected automatically when you leave it unmapped.
- Row check tells you how many rows are clean before you continue.
Step 4
Review and fix before saving
Every question is editable here with a confidence score. Fix wording, tick a different correct option, re-detect an answer, remove a question, or export the preview as CSV/JSON. Nothing is saved until you confirm.
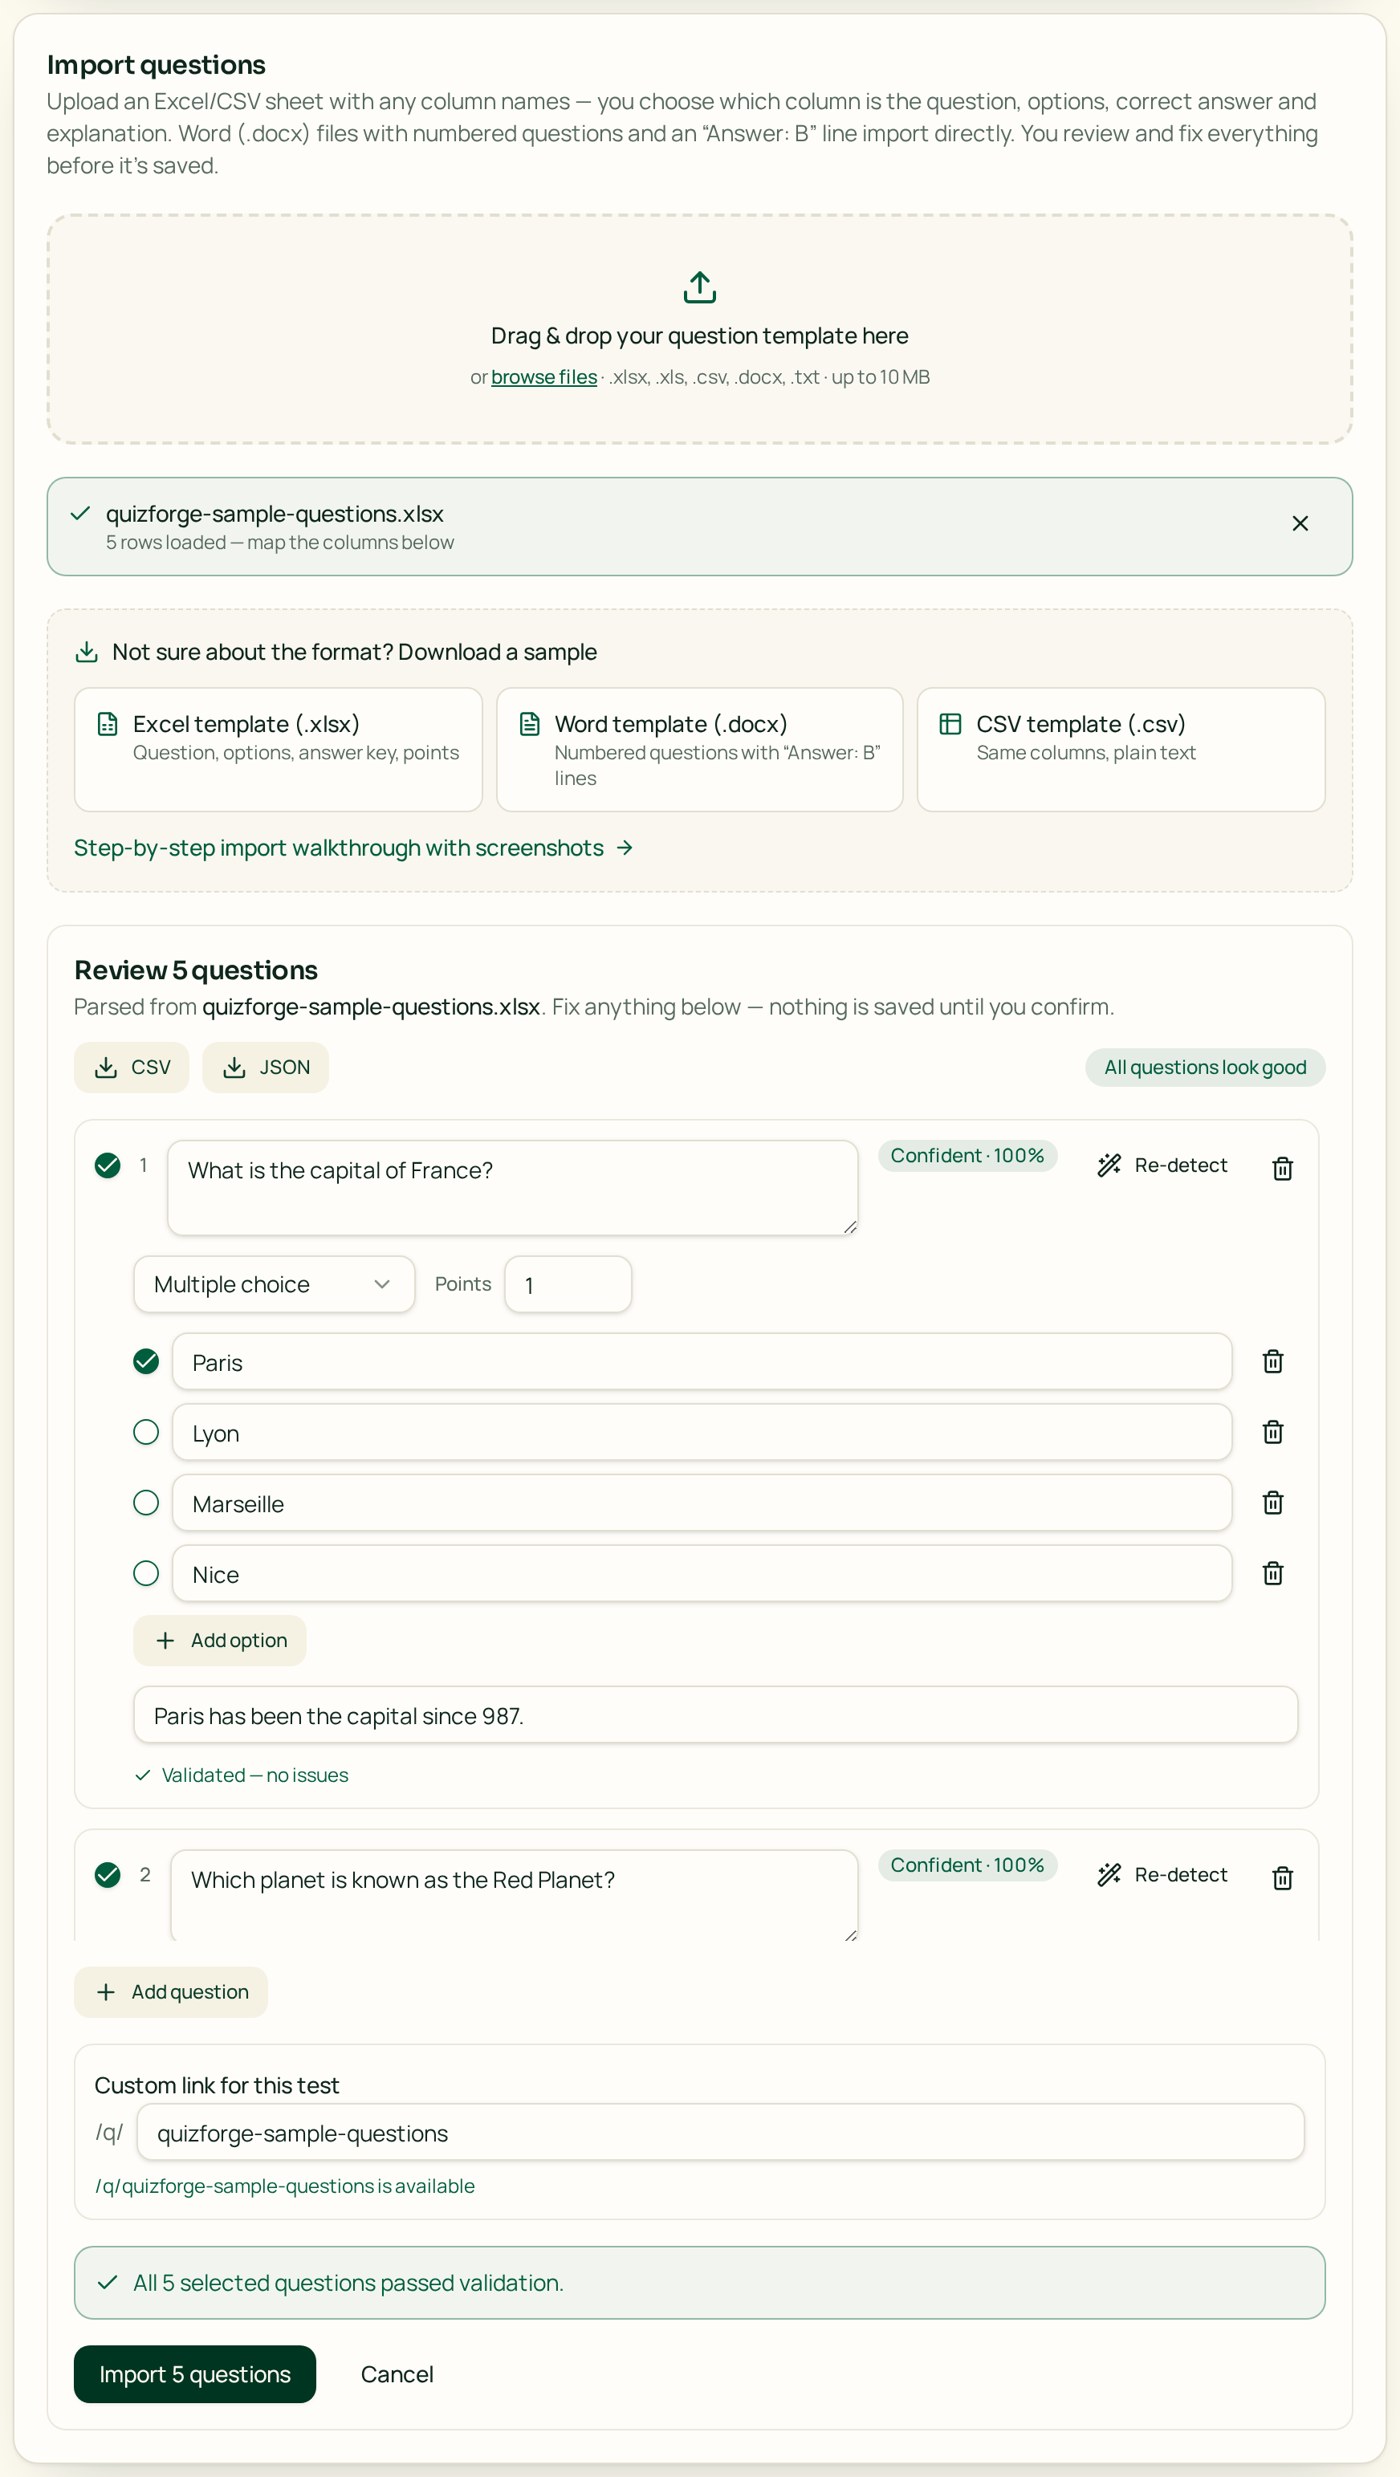
Import review step showing editable questions, confidence badges, re-detect buttons and the final Import questions button - Low-confidence items are flagged — check their answer key first.
- Untick a question to skip it instead of deleting it.
Step 5
Confirm the import
Press “Import N questions”. The summary tells you what was added, and the questions drop into your test where you can keep editing, save them to the question bank, or publish.
- Free plan tests have a question limit — the importer tells you how many still fit.
- Set the custom link for the test while you are there.
Import checklist
Ticks are saved on this device, so you can come back mid-import.